There is something deeply satisfying about watching a tiny seed push through the soil and stretch toward the light. It feels almost magical — but the truth is, it is pure science. Every plant you have ever grown started with this one critical moment: germination.
Getting it right makes all the difference between a garden that thrives and seeds that simply sit in the soil and do nothing. Once you understand how to germinate seeds properly, the whole process becomes far less guesswork and far more reliable.
In this guide, you will learn what germination actually means, why the right conditions matter so much, and exactly what steps to follow to give every seed its best possible start.
What is Seed Germination?
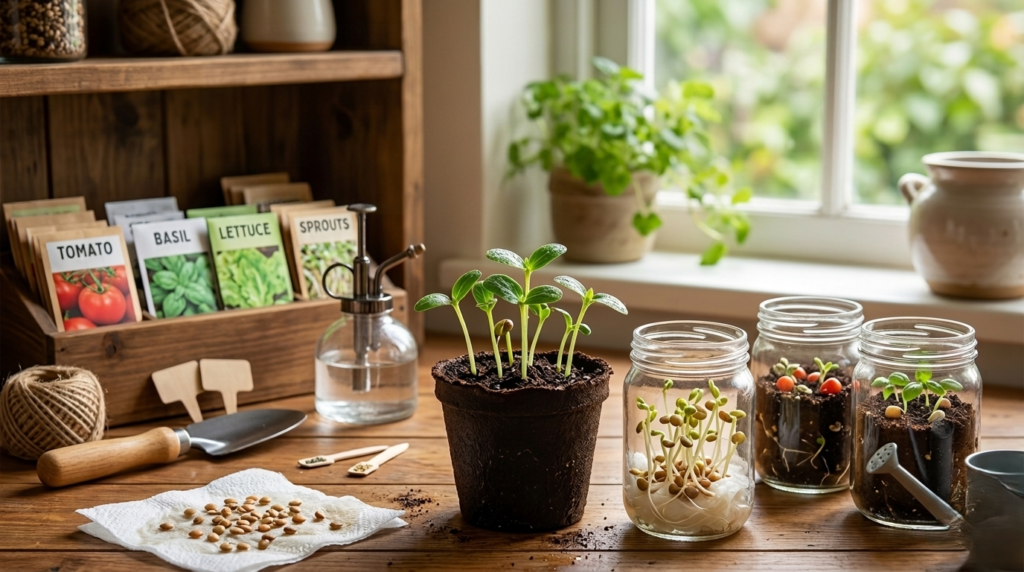
Seed germination is the process by which a dormant seed wakes up and begins developing into a new plant. Think of a seed as a tiny life form in a deep sleep — it has everything it needs to grow, but it is simply waiting for the right conditions to get started.
Once those conditions are met, the seed transitions from a compact, lifeless-looking capsule into a living seedling. The process happens in a clear sequence. First, the seed absorbs water through its coat — a stage called imbibition — which triggers internal enzymes to activate and begin breaking down stored nutrients. That moisture essentially flips the switch. Next, the primary root, known as the radicle, pushes downward into the soil, anchoring the plant and pulling in water and minerals. Finally, the shoot emerges and grows upward, breaking through the soil surface and opening its first leaves to catch sunlight. At that point, the seedling can begin making its own food through photosynthesis, and the plant is officially on its way.
Conditions Required for Seed Germination
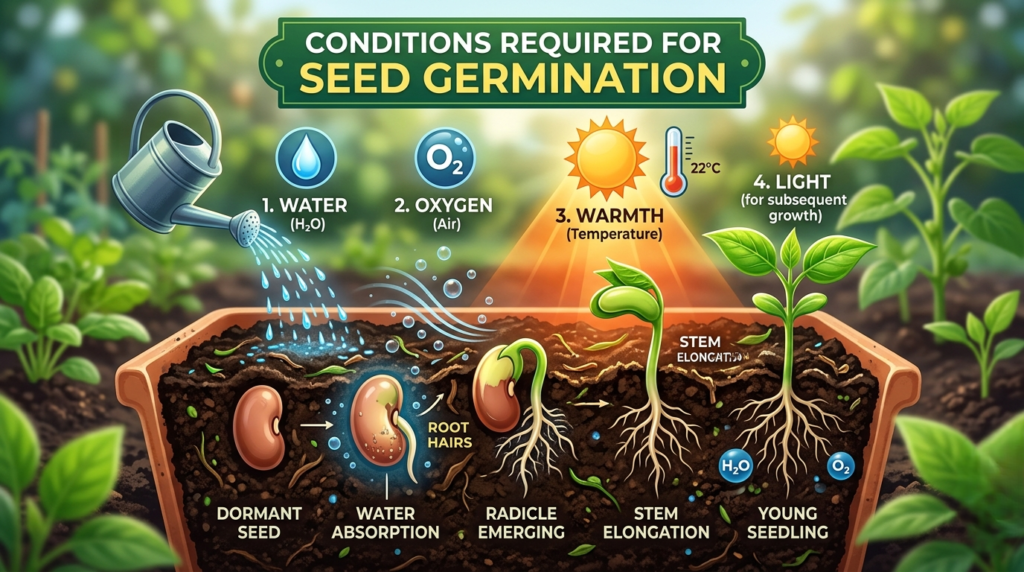
Growing seeds successfully comes down to getting four basic conditions right — and once you understand what each one does, it becomes much easier to give your seeds exactly what they need. Moisture is the first and most important trigger. Seeds need consistent dampness to activate the enzymes that kickstart growth, but there is a fine line between moist and waterlogged.
Overwatering is one of the quickest ways to lose seeds before they even get started, as sitting in excess water causes them to rot. Temperature is equally important — most seeds germinate best when soil temperature stays between 21–29°C (70–85°F). Cold soil slows everything down, and seeds may just sit there without any visible progress. Oxygen is another factor that often gets overlooked. Seeds are biologically active during germination and rely on air for cellular respiration to convert stored energy into fuel for growth, which is why compacted or waterlogged soil works against you. Finally, light requirements vary from one plant to another. Some seeds, like lettuce and certain flowers, actually need exposure to light to trigger germination and should be left near the soil surface. Others prefer complete darkness and need to be covered properly. Checking this detail for each seed variety before planting saves a lot of frustration later.
How to Germinate Seeds (Step-by-Step Guide)
Germinating seeds does not require expensive equipment or years of gardening experience. What it does require is following the right steps in the right order. Skip one, and you might find yourself waiting weeks for sprouts that never come. Here is exactly how to do it:
Step 1: Choose High-Quality Seeds- Everything starts with the seed itself. Fresh, high-quality seeds have significantly better germination rates than old or poorly stored ones. Always buy from a reliable supplier and check the packaging date before planting. If you are working with saved seeds, make sure they have been stored in a cool, dry place in a sealed container.
Step 2: Prepare the Growing Medium- Regular garden soil is too heavy and compact for young seeds. Instead, use a seed-starting mix that contains ingredients like peat moss, coco coir, or vermiculite. These materials hold just enough moisture while still allowing air to reach the seeds — a balance that garden soil rarely provides.
Step 3: Plant the Seeds Correctly- Depth matters more than most people realize. As a general rule, plant seeds at a depth roughly 2–3 times their size. Very small seeds can simply be pressed gently onto the surface. Planting too deep is one of the most common reasons seeds fail to sprout — they run out of stored energy before the shoot can reach the surface.
Step 4: Water Gently- After planting, water carefully using a spray bottle or a fine-head watering can. The goal is to keep the growing medium consistently moist but never soggy. Check it daily and water lightly whenever the top layer starts to dry out.
Step 5: Provide Warmth and Light- Seeds need warmth to germinate reliably. Place your trays near a sunny window, on top of a heat mat, or in any consistently warm spot in your home. Once sprouts appear, adequate light becomes essential to prevent weak, leggy seedlings.
Step 6: Wait for Sprouting- This is the part that requires the most patience. Depending on the seed type, germination can take anywhere from 3 days to 3 weeks. Fast growers like radishes and beans sprout quickly, while peppers and parsley take their time. Keep conditions stable, resist the urge to overwater while waiting, and trust the process.
Best Methods to Germinate Seeds
Not every seed germinates the same way, and not every gardener works with the same space or setup. The good news is that there are several practical methods to choose from, and each one has its own strengths depending on what you are growing and where you are doing it.
Soil Method: This is the most traditional and straightforward approach, and for good reason — it works well for the vast majority of seeds. You simply plant seeds directly into pots, seed trays, or garden beds filled with a quality seed-starting mix. There is no transferring or extra handling involved, which means less risk of damaging young roots once germination begins. It is the most natural environment for a seed to grow in and remains the go-to choice for most home gardeners.
Paper Towel Method: If you want results fast or want to test whether your seeds are still viable, the paper towel method is worth trying. Place your seeds between two layers of damp paper towels, slide them into a zip-lock bag, or cover them with a plate to hold in humidity, and keep the setup somewhere warm. Check daily, and you will usually see sprouting within a few days. One of the biggest advantages of this method is visibility — you can watch exactly when each seed germinates and transfer it to the soil at precisely the right moment.
Water Soaking Method: Some seeds come with thick, hard outer coats that slow down the absorption of water and delay germination. Soaking these seeds in room-temperature water for 12–24 hours softens the seed coat and allows moisture to reach the embryo much faster. Beans, peas, sunflowers, and morning glories are great examples of seeds that respond really well to soaking. Just be careful not to leave them in water longer than 24 hours, as extended soaking can cut off oxygen supply and do more harm than good. Once soaked, plant them immediately in a moist growing medium for the best results.
Tips to Germinate Seeds Faster
Waiting for seeds to sprout can feel like watching paint dry — especially when you are eager to get your garden going. The good news is that a few simple adjustments to your setup can noticeably cut down germination time and give your seeds a much stronger start. Here are the most effective tips to speed things along:
- Soak Seeds Before Planting: One of the easiest ways to fast-track germination is to soak your seeds in room-temperature water for 12–24 hours before putting them in soil. This softens the outer seed coat and allows moisture to reach the embryo much faster, which means the internal growth process kicks in sooner rather than later. It is a small step that makes a surprisingly big difference, particularly for seeds with thicker coats like beans, peas, and beetroot.
- Maintain Warm Soil Temperature: Heat is one of the most powerful triggers for germination. Cold soil is one of the main reasons seeds sit for weeks without any visible activity. Aim to keep your soil temperature consistently within the ideal range for your seed variety — most commonly between 21–29°C (70–85°F). Even moving your seed trays from a cold windowsill to a warmer spot in the room can speed things up considerably.
- Use Humidity Covers or Plastic Domes: Moisture loss is a constant issue during germination, especially indoors, where air can be dry. Placing a clear plastic dome or even a piece of cling wrap over your seed trays creates a mini greenhouse effect that locks in both warmth and humidity. This keeps conditions stable around the clock without requiring you to water as frequently, which also reduces the risk of overwatering.
- Use Heat Mats for Warmth: Seedling heat mats are one of the most reliable tools you can add to your germination setup. They sit beneath your seed trays and maintain a consistent bottom heat that encourages faster, more even sprouting. Unlike relying on room temperature alone, heat mats deliver warmth directly to the root zone where it matters most — making them especially useful during cooler months or in rooms that do not stay consistently warm.
Common Seed Germination Mistakes
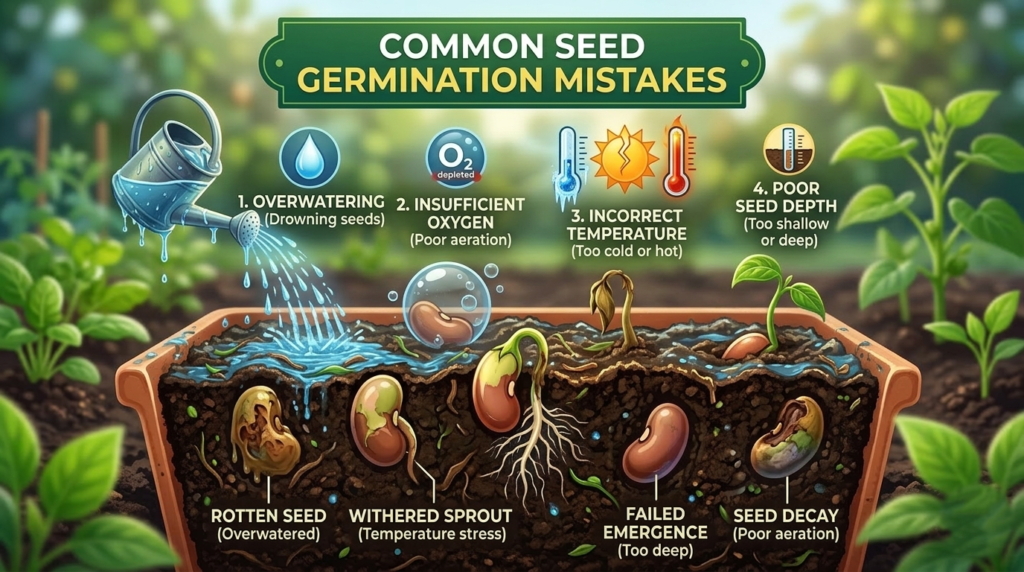
Even the most enthusiastic gardeners run into germination problems from time to time. The frustrating part is that most of these issues are completely avoidable once you know what to look out for. Here are the most common mistakes people make and how to steer clear of them:
- Overwatering Seeds: This is hands down the most frequent mistake, and it is responsible for more failed germination attempts than almost anything else. It is easy to assume that more water means faster growth, but the opposite is true. Soggy soil cuts off oxygen supply to the seed, creates the perfect environment for mold and fungal growth, and causes seeds to rot before they ever get the chance to sprout. The soil should feel like a wrung-out sponge — moist throughout but never dripping wet.
- Planting Seeds Too Deep: Depth is one of those details that seems minor but has a major impact on germination success. Every seed carries a limited amount of stored energy to fuel the shoot’s journey to the surface. When planted too deep, that energy runs out before the seedling can break through the soil and reach light. A good rule of thumb is to plant seeds at a depth roughly 2–3 times their diameter, and for very small seeds, simply pressing them onto the surface is enough.
- Using Poor Soil: Reaching for the nearest bag of garden soil or potting mix might seem convenient, but it is rarely the right choice for germinating seeds. Heavy soils compact easily, drain poorly, and may carry bacteria or fungal spores that are harmless to mature plants but deadly to vulnerable seedlings. Always use a proper seed-starting mix that is light, sterile, and designed to support the earliest and most fragile stage of plant life.
- Lack of Light or Warmth: Seeds that are kept in cold, dimly lit spots struggle to germinate consistently. Cold temperatures slow down the biological processes happening inside the seed, while insufficient warmth after sprouting leads to weak, stretched-out seedlings that are fighting to find light. Make sure your seeds are in a consistently warm environment during germination, and once they sprout, get them under adequate light as quickly as possible to support strong, healthy early growth.
Conclusion
Seed germination is really just about understanding what a seed needs and giving it exactly that, the right moisture, warmth, oxygen, and light. Once those basics are in place, nature takes care of the rest. What starts as a tiny seed buried in soil gradually becomes something you can actually watch grow, harvest, and enjoy. Every gardener, no matter how experienced, still finds that moment of first sprouting genuinely exciting. Now that you have a clear understanding of the entire process — from soil preparation to transplanting — the only thing left to do is get your hands in the soil and start growing.
Frequently Asked Question
Q1: How long does it take for seeds to germinate? Germination time varies depending on the seed type. Fast-growing seeds like radishes and beans can sprout in as little as 3 days, while slower varieties like peppers and parsley can take up to 3 weeks. Keeping conditions stable — consistent warmth, moisture, and light — will help ensure sprouting happens within the expected timeframe.
Q2: Why are my seeds not germinating? The most common culprits are overwatering, planting seeds too deep, cold soil temperatures, or using the wrong type of soil. Seeds need moist (not soggy) soil, a temperature between 21–29°C (70–85°F), and a light seed-starting mix rather than heavy garden soil. Checking these four factors will resolve most germination issues.
Q3: What is the fastest way to germinate seeds? Soaking seeds in room-temperature water for 12–24 hours before planting is one of the quickest ways to speed up germination. Combining this with a seedling heat mat, a humidity dome over your trays, and consistently warm soil temperatures can significantly cut down sprouting time.
Q4: When should I transplant my seedlings after germination? Wait until your seedling has developed 3–4 true leaves — not the first pair (cotyledons), which are part of the seed itself. At this stage, the root system is strong enough to handle the move. When transplanting, handle by the leaves rather than the stem, water thoroughly afterward, and keep the plant in a shaded spot for a day or two to ease the transition.